Step 1: Check student’s profile in MyLanguageBird.
Once you get assigned a student, the first step is to take a look at their schedule and enrollment information in MyLanguageBird.
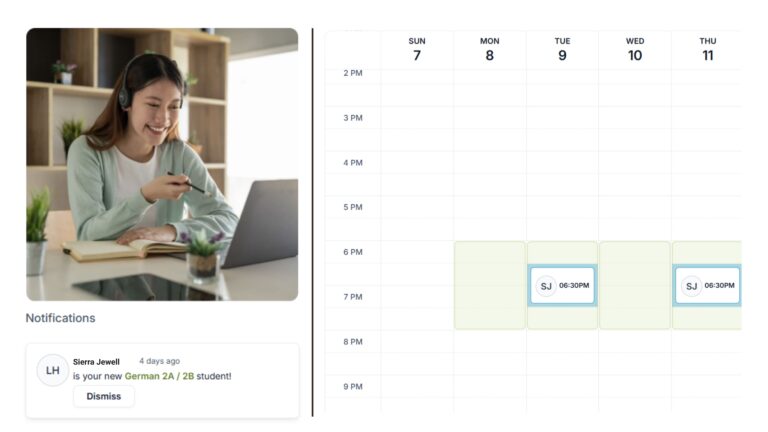
You will get notified via Outlook email about a new student match, and a notification will also appear in your MyLanguageBird account.
❗Once matched, the student’s lessons will appear under your lessons, and their scheduled lessons will appear on your calendar. Please send your introduction email (see below for more information) within 24 business hours of being matched.
You will want to review your student’s profile in MyLanguageBird to find their parents’ (or other associated contacts’) email addresses and to read any special notes included with their enrollment.
Please view the tutorial below to learn how you can access the most important information:
- Program and Level: Most high school students are enrolled in the Core, Achieve, or Excel programs. It’s crucial to locate the program type in order to upload the correct files to your student’s Class Team. For example, we have different LNGs for each program type. Remember that the Achieve and Excel LNGs include slots for mastery lessons in addition to the 12 instructional lessons that are part of all for-credit programs.
- Language Experience: This information will include details like formal learning experience or heritage language experience.
- Learning Needs: This information will contain any learning needs the student may have, like learning differences (e.g., ADHD, dyslexia, etc.) or other unique needs and/or specific academic goals.
- Associated Contacts: This information is important because you should CC all of a student’s associated contacts on all email communication. Never respond to a contact that isn’t listed on the student’s profile.
Step 2: Set Up Class Team.
The Class Team is where classes will take place via Microsoft Teams. This is where you and your student will meet for live class, where you will upload files, and where homework will be assigned. Class Teams are generated automatically for your convenience, and your job is to add your Department Mentor and Head as owners to the team.
Step 3: Upload Files to Class Team.
Once you’ve added your Mentor and Department Head, you can now create the different folders in the Team under Files and upload the required documents.
Step 4: Send Intro Email.
After reviewing your student’s profile and setting up the Class Team, it’s time for you to send out your intro email to the student and the parent (or other contacts). Don’t forget to CC introductions@languagebird.com on this email too!
❗Please do not assume the first class is confirmed until you get email confirmation from the student.
❗Please send your introduction email (see below for more information) within 24 business hours of being matched.
If you don’t hear back from your student, please open a Support Ticket and a member of the Academic Department will reach out to them directly.